
NovaStar CX40 Pro LED Controller: Specs, Setup and Manual
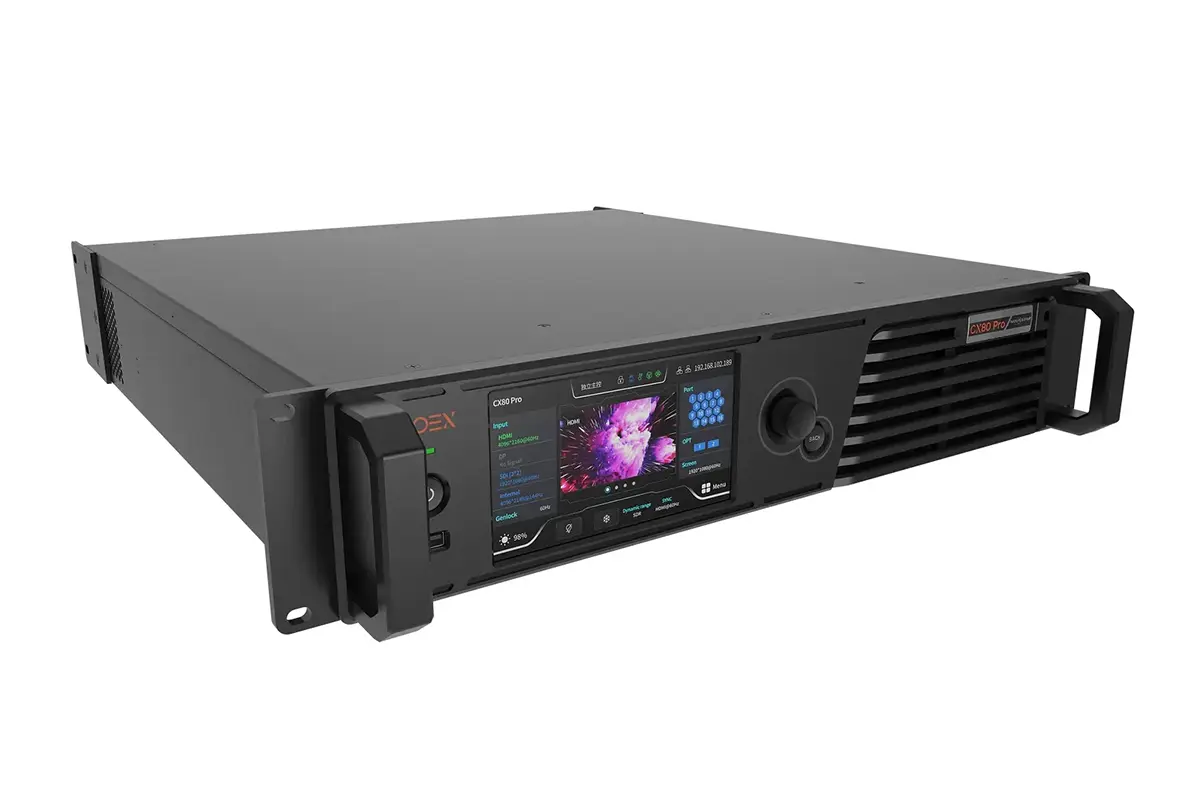
The NovaStar CX40 Pro is a 4K LED display controller for NovaStar’s COEX 5G system. It combines video processing and LED sending in one unit, with six 5Gbps Ethernet outputs and a maximum device load of nine million pixels. For buyers comparing controllers and technicians preparing a show, the important question is whether the complete signal chain fits the screen.
This NovaStar CX40 Pro guide explains specifications, receiving-card compatibility, VMP setup, pixel planning, troubleshooting, and manual selection. It also covers what to include in a price request. The practical planning examples are illustrative; your cabinet configuration, signal format, firmware, and required operating mode must be checked together before commissioning.
1. What Is the NovaStar CX40 Pro LED Display Controller?
The NovaStar CX40 Pro sits between a video source and the receiving electronics inside LED cabinets. A media server, presentation computer, or production switcher supplies the picture. The controller assigns that picture to the screen layout and sends the appropriate data to each cabinet. Readers new to screen construction can start with HonghaiLED’s LED video wall guide.
“NovaStar CX40 Pro 5G” describes the wired LED output system; it does not mean cellular 5G or wireless video. Treat short searches such as “NovaStar CX40” as a reason to confirm the complete model name on the quotation and equipment label. Similar controller names can hide very different output architectures.
A useful way to specify the NovaStar CX40 Pro is to write down three separate requirements: the source format, the LED wall’s physical pixel resolution, and the receiving-card system. Pixel pitch alone cannot select a controller. Two screens with the same pitch can have very different dimensions, cabinet counts, data routes, and total pixel loads.
This is also why replacing a processor is not automatically a plug-in upgrade. Existing cabinets need a supported receiving-card and firmware combination. Request that information from the cabinet manufacturer before planning a new controller around an older rental inventory.
2. Key Features of the NovaStar CX40 Pro LED Display Controller
01. Video inputs, 5G outputs, and optical transport
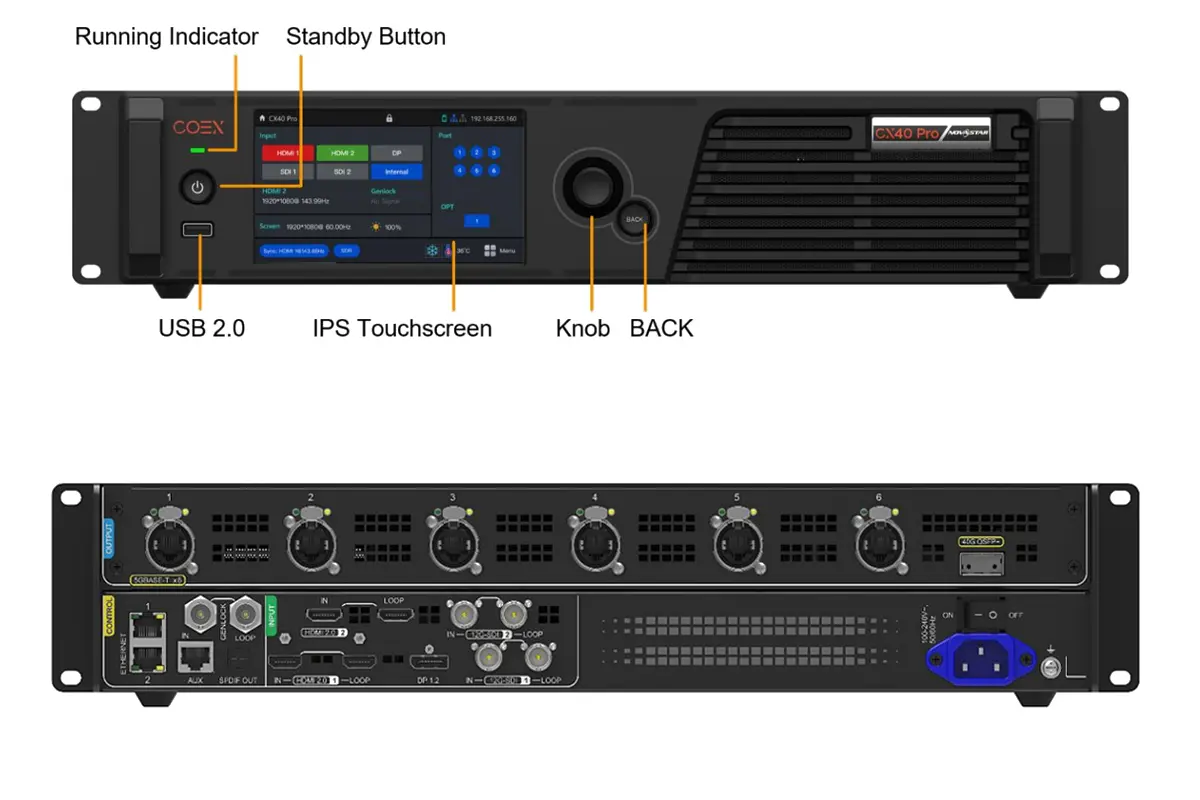
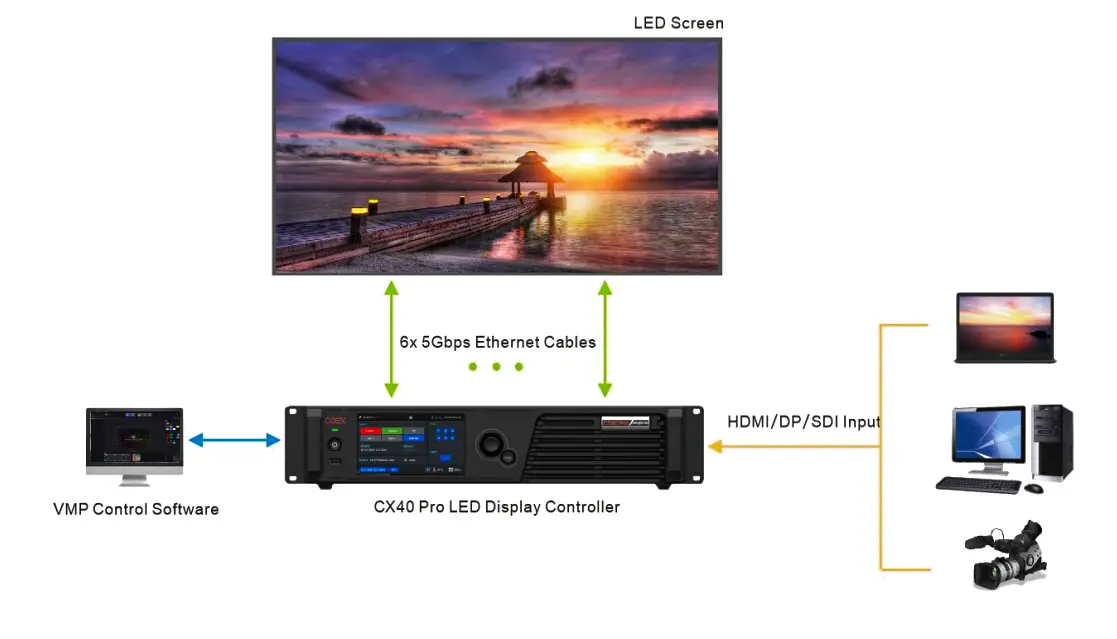
The NovaStar CX40 Pro offers HDMI 2.0, DisplayPort 1.2, and 12G-SDI inputs. Its six 5Gbps screen outputs and 40Gbps optical connection serve different cabling requirements. The separate control Ethernet ports connect the management computer. Label these connections clearly: the management network and the LED data path have different jobs.
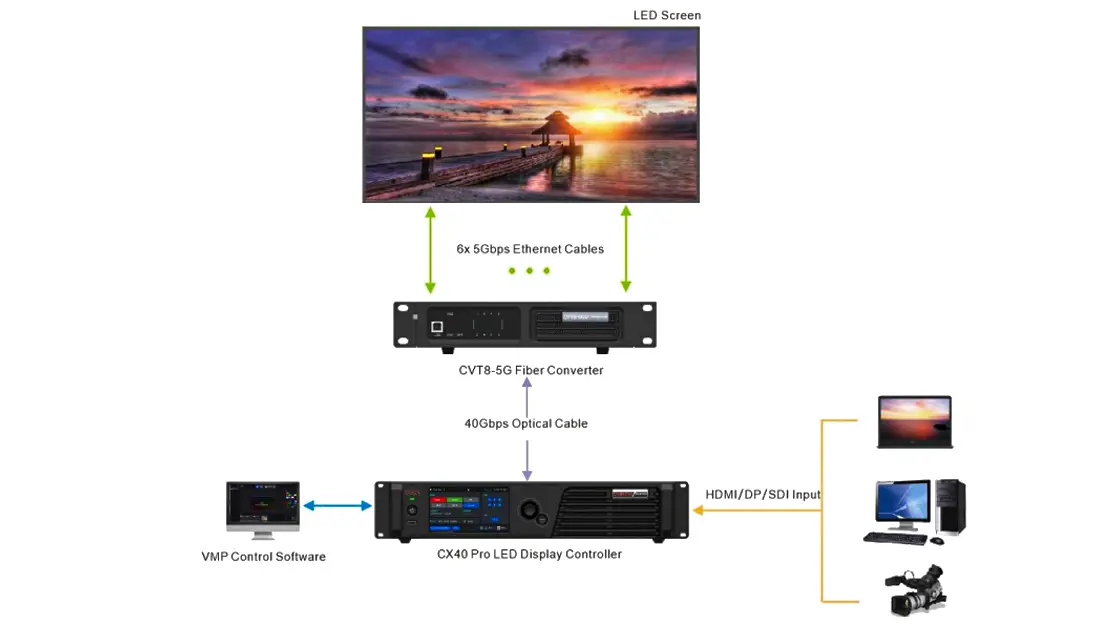
For a source rack close to the screen, direct copper cabling may simplify installation. For a remote stage, specify the optical module, converter, fiber type, connectors, and distance as a complete assembly. A “40G” label describes bandwidth, not a guaranteed distance or compatibility with every fiber converter.
02. Processing modes and operational control
The NovaStar CX40 Pro has All-In-One and Send-Only modes. Select the mode around where image composition occurs. When a media server already creates the exact screen canvas, avoid an unnecessary extra scaling step. When operators need the controller to compose sources, plan the layer layout and scaling before building show presets.
NovaStar lists up to three 4K layers, a 5.5-inch touchscreen, and VMP computer control. The practical benefit is a repeatable operating workflow: an operator should be able to identify the active source, recall a tested layout, and distinguish a disconnected signal from a deliberately blacked-out display.
03. Receiving-card compatibility comes first
The NovaStar CX40 Pro V1.5.0 specification lists XA50 Pro and CA50E receiving cards; CA50E requires V1.3.0.0 or later. Advanced functions also depend on cabinet electronics and configuration. Do not assume that every NovaStar receiving card is compatible because it carries the same brand.
Before ordering, ask for the actual receiver model, firmware version, cabinet pixel dimensions, driver IC, and a tested cabinet configuration. Keep that information with the screen inventory. It makes replacement-panel preparation and fault isolation much easier than relying on a generic description such as “P2.6 rental cabinet.”
3. NovaStar CX40 Pro Specifications and Pixel Capacity
Use this NovaStar CX40 Pro specification summary as a planning checklist. The reference documents are the CX40 Pro Specifications V1.5.0 and User Manual V1.5.0, dated September 30, 2025. A maximum value is a limit under specified conditions, not a promise that every maximum works simultaneously.
| Item | Documented specification | What to check |
|---|---|---|
| Device capacity | Up to 9 million pixels | Total screen load, canvas, and operating format |
| Video inputs | 2 × HDMI 2.0; 1 × DP 1.2; 2 × 12G-SDI | Source timing, bit depth, chroma sampling, and cable |
| LED outputs | 6 × 5Gbps Ethernet; 1 × 40Gbps QSFP+ optical | Receiver compatibility and optical equipment |
| 4K input example | 4096 × 2160 at 60Hz | Consult the interface-specific video format table |
| Per-port load at 60Hz | 8-bit: 2,951,200; 10-bit: 2,213,200; 12-bit: 1,475,600 pixels | Receiver combination; full capacity needs load width ≥128 pixels |
| Processing | Up to 3 × 4K layers; HDR10 and HLG | Working mode and content workflow |
| Control | Touchscreen and COEX VMP | Compatible software and firmware versions |
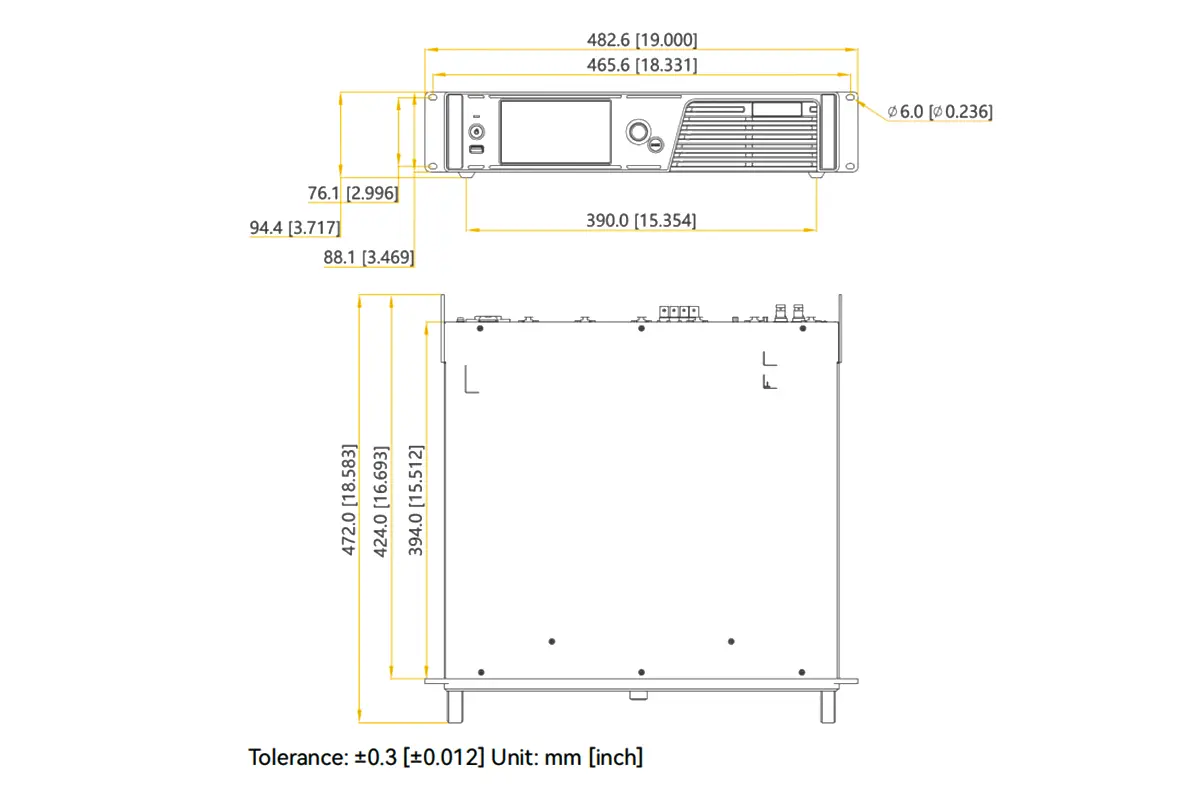
| Rack format | 2U | Rack depth, ventilation, rear cable clearance |
01. Calculate screen pixels before assigning ports
For an illustrative wall with 256 × 256-pixel cabinets, arranged 12 cabinets wide and six high, the screen is 3072 × 1536 pixels. Its total load is 4,718,592 pixels. That falls below the NovaStar CX40 Pro headline device capacity, but the job still needs a valid port map and source canvas.
If six output chains each serve 12 cabinets, each chain carries 786,432 pixels. This arithmetic is a starting point, not an approved wiring plan. Check the receiver loading limit, number of receivers per chain, cable routing, frame rate, and any backup arrangement in the actual project. A physically convenient chain can still be electrically or logically unsuitable.
02. Keep device, port, and input limits separate
Do not multiply the maximum per-port number by six and treat the result as a larger controller capacity. Likewise, a source accepted at 4K does not guarantee that an arbitrary screen shape or high-frame-rate configuration is supported. The NovaStar CX40 Pro must satisfy all relevant limits together.
Reserve planning time for the intended bit depth. Increasing color precision or frame rate changes the bandwidth requirement. If a project may switch between presentation and camera workflows, validate both formats before installation. Record the tested settings alongside the cabinet map so another technician can reproduce them.
4. How to Set Up the NovaStar CX40 Pro for an LED Display System
A reliable NovaStar CX40 Pro setup starts with a documented screen rather than trial-and-error settings. Prepare the cabinet map, receiver configuration, source format, and cable labels before powering the complete wall. The following sequence is a commissioning checklist, not a substitute for the cabinet supplier’s electrical and mechanical instructions.
01. Confirm the hardware and software baseline
Record the controller and receiving-card versions. Obtain the matching COEX VMP installer and the exact cabinet configuration from the supplier. If the screen already works, preserve its project and configuration before making changes. Store the files with meaningful names that include the project, cabinet type, and date.
Use a small, known-good cabinet group to establish the baseline. This reduces the number of possible faults while you confirm the source and receiver configuration. Do not load an unrelated configuration merely because its filename mentions the same pixel pitch; scan method, driver IC, wiring, and module layout can differ.
02. Connect the source, controller, and screen
Connect the selected video source to the correct input, and connect the VMP computer to a control Ethernet port. Wire each LED output chain according to the planned cabinet order. For an optical route, confirm both ends of the link and the converter port allocation before connecting the screen.
Label each cable at both ends with its controller, output number, and cabinet destination. Keep a simple connection drawing in the equipment case. During troubleshooting, this is more useful than a photograph showing several visually identical cables disappearing into the back of a rack.
03. Verify input timing and screen status
On the NovaStar CX40 Pro, confirm that the selected source is present at the expected resolution and frame rate. Check the computer’s actual output rather than only its desktop resolution. Adapters, switchers, and EDID negotiation can change the transmitted format.
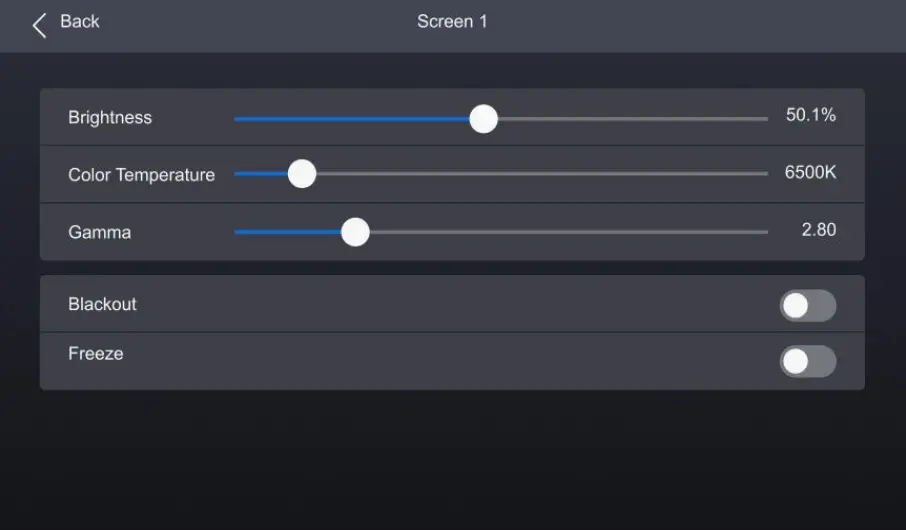
Establish ordinary SDR playback before introducing HDR, additional layers, or camera synchronization. Check that the output is neither frozen nor blacked out. If the picture is absent, try an internal test pattern to separate a source-side issue from a screen-side issue. Change one variable at a time and write down the result.
04. Build the cabinet map in VMP
In COEX VMP, identify the correct controller, load the validated cabinet configuration, and arrange cabinets to match their physical positions and cable sequence. Confirm each output’s load. A correct total pixel count does not detect a reversed chain, swapped output, or duplicated cabinet position.
Use cabinet identification and test patterns to verify the map from the audience’s viewpoint. Follow a line or grid across every seam. Check the first and last cabinet on each chain, because an error near a chain boundary can be missed when viewing ordinary video from a distance.
05. Set the image workflow and rehearse operation
Select the required working mode, source crop, and scaling behavior. Test fine text and one-pixel patterns when pixel-for-pixel reproduction matters. Then configure color processing and synchronization for the actual content. The NovaStar CX40 Pro project should describe what the operator intends to display, not merely what happened to work during initial setup.
Save tested presets with descriptive names such as “Main presentation” and “Camera feed.” Rehearse source loss, a computer reconnect, and power restoration during commissioning. Confirm the screen returns to the intended state. Keep an operator copy of the cable map and the recovery procedure with the system.
06. Locate the NovaStar CX40 Pro manual and firmware
Use the complete document title and version when searching for a NovaStar CX40 Pro manual. The user manual covers front-panel operation; the specification includes capacity and feature limitations; release notes explain upgrade dependencies. HonghaiLED’s NovaStar software download directory is a starting point, but select COEX VMP for this workflow and verify its supported controller version.
For the V1.5.0 upgrade specifically, NovaStar’s release notes require CX40 Pro firmware V1.1.0 or later first. Older units need the intermediate upgrade using VMP V1.2.3; CA50E must be V1.3.0.0 or later. The V1.5.0 controller upgrade is then performed with VMP V1.5.0. Follow the release notes for the version you actually install.
Schedule firmware work before the event, with time to restore and retest the source format. The documented front USB port is for diagnostic export; do not assume that copying firmware onto a USB drive is the supported update method. Keep the known-good configuration and version record available for support.
5. Image Processing Capabilities of the NovaStar CX40 Pro
01. HDR and color management
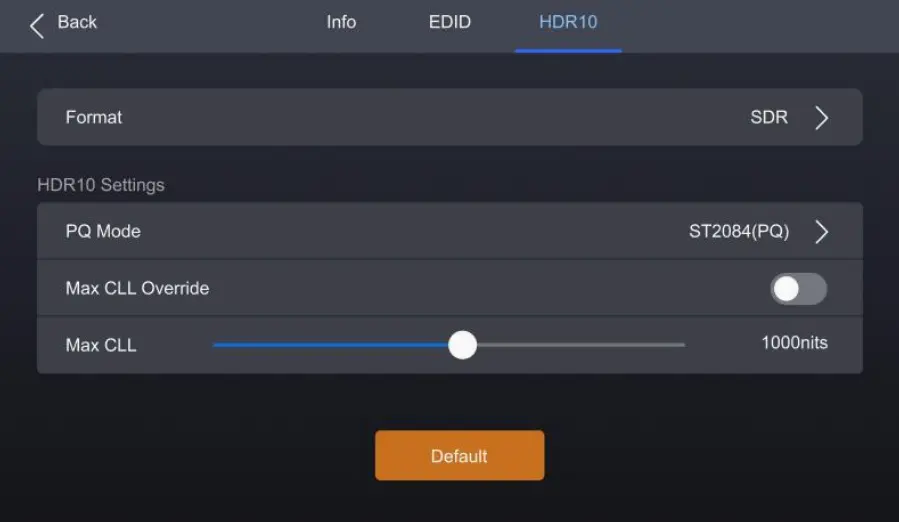
The NovaStar CX40 Pro supports HDR10 and HLG, but the result depends on the source, processing settings, and LED hardware. Verify whether the program is SDR or HDR before adjusting the display. Incorrect interpretation can produce an image that looks flat, overly dark, or clipped even when the signal is present.
A 3D LUT transforms color values; it does not automatically make an LED wall identical to a reference monitor. Confirm the intended input and output color spaces, and avoid applying the same transformation twice in the media server and controller. Evaluate skin tones, neutral grays, saturated graphics, and highlight detail using representative content.
For the NovaStar CX40 Pro, document each correction and why it was applied. A measured calibration, a creative look, and a last-minute brightness adjustment serve different purposes. Keeping them distinct makes it easier to diagnose an unexpected change when a new source or content package arrives.
02. Calibration and advanced functions
Cabinet uniformity should be checked at the operating brightness, including dark gray content. A screen that looks acceptable on a full-white test can still reveal seams or tint differences in a dim scene. Keep spare cabinets in the same calibration and configuration workflow as the main wall.
The NovaStar CX40 Pro specification makes advanced features conditional. Dynamic Booster needs compatible receivers and colorimeter correction; adaptive frame-rate operation needs supported driver ICs and a prepared NCP file. COEX V1.5.0 moves calibration to CC3 rather than Calcube 2.x. Confirm these dependencies with the cabinet supplier before promising a feature to a production team.
03. Latency, Genlock, and camera testing
NovaStar’s V1.5.0 limitation table says Low Latency and Genlock cannot be enabled together. The NovaStar CX40 Pro low-latency specification concerns controller processing, not the entire camera-to-screen delay. Cameras, capture devices, media servers, switchers, and receiving electronics all contribute to the final result.
Choose the operating priority before the shoot, then test the complete chain. Film motion and gray ramps with the actual camera, shutter, and frame rate. Synchronization cannot by itself eliminate every scan artifact, moiré pattern, or tracking delay. Acceptance should be based on recorded footage and measured behavior, not a feature name.
6. Typical Applications of the NovaStar CX40 Pro LED Display Controller
01. Live events and corporate presentations
A NovaStar CX40 Pro can suit productions that need several source types and compatible 5G cabinets. Build presets around the show rundown and check every presentation computer in rehearsal. Confirm how full-screen slides, a camera feed, and an emergency holding graphic will be selected, and identify who has control of the active layout.
For rental work, standardize cabinet labels, cable kits, and project naming. A controller’s processing ability does not replace disciplined inventory management. Keep the verified configuration with each cabinet batch, especially when a wall combines equipment from different purchase dates.
02. Broadcast, virtual production, and fixed installations
For a camera-facing wall, evaluate the NovaStar CX40 Pro as part of the complete production system. Include the camera department in acceptance testing. For a fixed installation, prioritize accessible maintenance, documented source settings, ventilation, and recovery after a power interruption. The best configuration is one the operating team can understand and reproduce.
03. Troubleshooting the NovaStar CX40 Pro
Start with the smallest test that isolates the fault. The table below separates source, mapping, transport, and image-processing symptoms. Record the observed format and recent changes before resetting anything; a factory reset can erase useful evidence and a working portion of the configuration.
| Symptom | First checks | Useful isolation test |
|---|---|---|
| Whole wall black | Power, blackout state, selected input, source timing | Display an internal pattern to separate input from output faults |
| One chain missing | Output assignment, first cable, receiver power | Use a known-good cable and a small cabinet group |
| Cabinets in the wrong order | Physical cable order versus VMP topology | Identify cabinets and trace a grid across chain boundaries |
| Soft text or cropped edges | Source raster, crop, layer size, scaling | Compare a pixel grid with the intended screen canvas |
| Washed-out or tinted image | SDR/HDR interpretation, range, LUT, calibration | Return to a documented baseline and a known test source |
| Camera bands or flicker | Camera timing, sync, cabinet configuration | Record test footage while changing one parameter at a time |
| Optical path fails | Module pairing, fiber, connector condition, converter | Verify a supported short link before testing the venue run |
7. Is the NovaStar CX40 Pro the Right Controller for Your LED Display?
01. NovaStar CX40 Pro vs MX40 Pro
Choose between the NovaStar CX40 Pro and MX40 Pro primarily by the receiving system and data distribution, then by input and layer requirements. The models share the COEX platform but have different physical output arrangements. The comparison below corrects a common source of confusion: the MX40 Pro has 20 physical Gigabit Ethernet outputs and four 10G optical ports.
| Decision point | CX40 Pro | MX40 Pro |
|---|---|---|
| Output system | COEX 5G | COEX 1G |
| Physical Ethernet outputs | 6 × 5Gbps | 20 × 1Gbps |
| Optical outputs | 1 × 40Gbps QSFP+ | 4 × 10G OPT |
| Video inputs | 2 HDMI 2.0, 1 DP 1.2, 2 12G-SDI | 3 HDMI 2.0, 1 DP 1.2, 1 12G-SDI |
| Headline device capacity | 9 million pixels | 9 million pixels |
| Selection priority | Compatible 5G cabinets and transport | Compatible 1G cabinets and distribution |
More ports do not automatically mean more total screen pixels. Optical modes and backup arrangements also affect how outputs are used. Read HonghaiLED’s NovaStar MX40 Pro guide for that model’s workflow, and ask the supplier to confirm a complete topology for your cabinet inventory.
02. What determines the NovaStar CX40 Pro price?
Request an itemized NovaStar CX40 Pro quotation rather than comparing controller-only figures from different markets. Currency, tax, shipping, warranty, optical modules, fiber converters, receiving cards, and commissioning support can change the delivered system cost. This guide does not present an unverified universal price.
Send the supplier your screen resolution, cabinet model, receiver type, source formats, frame rate, bit depth, cable distance, and backup requirement. Ask which accessories are included and which are optional. For an existing wall, include photographs of equipment labels and the current configuration record so compatibility can be checked before purchase.
A smaller controller may be more appropriate for a modest screen with one uncomplicated source. The NovaStar CX40 Pro is most useful when its output architecture and processing functions solve a defined requirement. Avoid paying for features that the installed cabinets cannot support or that operators will never use.
8. NovaStar CX40 Pro FAQs
01. Is NovaStar CX40 Pro 5G a wireless controller?
No. In this product context, 5G refers to the wired 5Gbps LED output system. The NovaStar CX40 Pro still needs a video source, a configured screen data path, and compatible receiving hardware. Include the full model name in purchase and support requests.
02. Which receiving cards work with the NovaStar CX40 Pro?
The V1.5.0 specification lists XA50 Pro and CA50E, with CA50E V1.3.0.0 or later. Verify the exact combination with the cabinet supplier. Advanced functions can have additional driver-IC, firmware, calibration, or configuration requirements.
03. How many pixels can the NovaStar CX40 Pro control?
The documented device maximum is nine million pixels. The usable design must also fit per-port capacity, frame rate, bit depth, receiver limits, and canvas requirements. Calculate the cabinet load and verify the project instead of treating the headline number as a complete design check.
04. Where can I find the NovaStar CX40 Pro manual?
Look for the model-specific user manual, specification, and release notes in the NovaStar COEX documentation collection. Check the version inside each document against the installed system. The manual explains controls; the specification and release notes clarify limits and upgrade requirements.
05. Can I use Genlock and Low Latency together?
The CX40 Pro V1.5.0 specification says these functions cannot be enabled simultaneously. Choose the operating mode for the production requirement and test the full signal chain. A low controller-processing figure does not describe total camera-to-screen latency.
06. Does the NovaStar CX40 Pro support 3D?
V1.5.0 adds 3D support with the required emitter and compatible glasses. Its documented limitations prevent simultaneous use with Low Latency or Frame Multiplication. Confirm the intended 3D workflow and accessories before including the feature in an event specification.
07. Should I update firmware immediately before a show?
Allow a separate maintenance and rehearsal window. Preserve the working project, follow the target release notes, and retest input timing, mapping, presets, and recovery afterward. An upgrade should solve a known requirement and leave enough time for verification.
08. What should a CX40 Pro price request include?
Provide the cabinet and receiving-card models, total pixel resolution, source formats, transport distance, and redundancy needs. Ask for a breakdown of controller, optics, converters, shipping, warranty, and support. That makes quotes comparable and reduces the chance of missing accessories.
9. Conclusion: Plan the Complete CX40 Pro System
The NovaStar CX40 Pro is a strong candidate when a project needs COEX 5G outputs, suitable video inputs, and a managed VMP workflow. A successful installation starts with verified cabinets, a valid port map, the correct source format, and tested operating settings. Image quality and reliability depend on that complete system.
Before buying or commissioning the NovaStar CX40 Pro, prepare a one-page requirement sheet and ask for written compatibility confirmation. Contact HonghaiLED with the screen resolution, cabinet electronics, and installation layout to discuss a suitable controller configuration and itemized quotation.
Technical references: NovaStar CX40 Pro Specifications V1.5.0, User Manual V1.5.0, COEX controller V1.5.0 Release Notes, and NovaStar COEX 1G/5G product comparison tables. Version-specific information was checked on October 9, 2026. Confirm the release notes supplied with any newer firmware before applying these procedures.
Related Posts
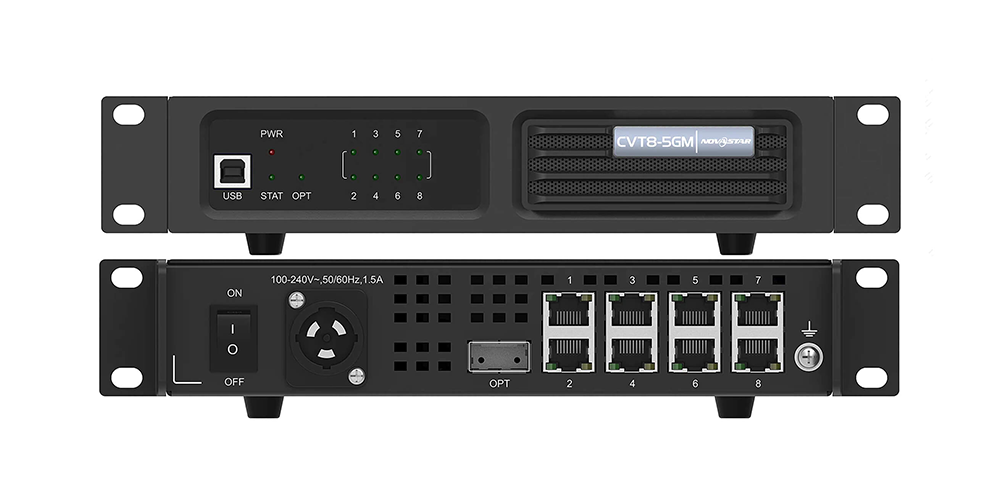
NovaStar CVT8-5GM Fiber Converter: Specifications, Setup and Manual
The NovaStar CVT8-5GM is a multimode LED display fiber converter…
NovaStar MRV416-N Receiving Card: Specs, Setup & Manual
The NovaStar MRV416-N receiving card connects a compatible LED controller…
NovaStar MRV412-N Receiving Card: Specs, Firmware and Setup Guide
The NovaStar MRV412-N receiving card connects a compatible LED display…

No Comments